Caring for Your Family Photos
Windows Into Our Past
The Shiloh Museum has thousands of photographs in our care. We cherish each piece of history contained within these visual records. Caring for older photographs requires some attention. Here we’ve outlined what a photo is and you can care for your photos, too.
What is a Photo?
The word “photograph” comes from the Greek photos (light) and graphein (to draw). A photo is composed of layers, much like a pizza. These are the layers of a photograph.
Base or Support (the crust) – The primary material upon which the photo lies. Common bases include paper, copper or iron sheet, glass plate, and plastic (e.g., acetate, polyester, nitrate).
Binder or Emulsion (the sauce) – This is the transparent material which holds light-sensitive materials to the base. Common emulsions include albumen, gelatin, gum Arabic, and collodion (made up, in part, by cellulose).
Light-Sensitive Materials (the pepperoni & cheese) – These are the elements that actually bear the image. They are made of compounds of silver, iron, and platinum, or color-processing dyes.
Types of Photos
Photography got its start in the late 1830s. Since then there have been numerous types of photographic processes invented and used. Here are some of the more common types of photos that you might find in your collection.
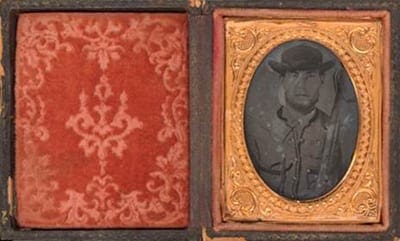
This is a small, milky-gray photo on a copper sheet, usually with a protective glass cover, housed in a fancy case. Popular from 1840 to the 1860s.

Tintype photos are small, milky-gray photos on an iron sheet. Introduced in 1856 and popular into the early 20th century.

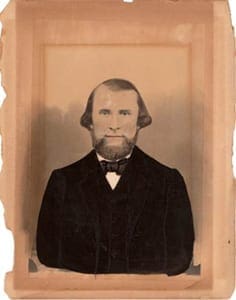
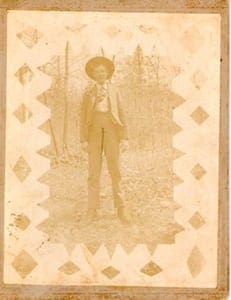
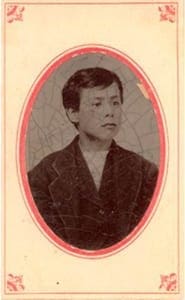
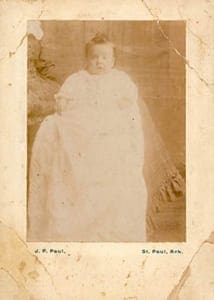
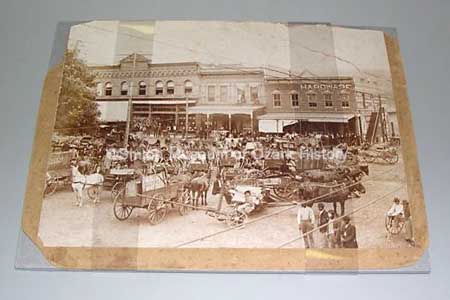
Albumen photos are often sepia-colored photos mounted onto a pasteboard. Popular from 1851 to 1900s. Two common sizes were the cabinet card (4 ¼” x 6 ½”) and the carte-de-visite (2½” x 4″).
 A large-scale photo (usually a portrait) mounted onto pasteboard and hand-finished with charcoal, pastels, or paint for an artistic effect. Popular from the 1860s to the turn of the 20th century.
 Matte steely gray or black print with a crisp image mounted onto pasteboard. Used from 1880 to the 1930s; widely used in commercial portraiture after the turn of the 20th century.
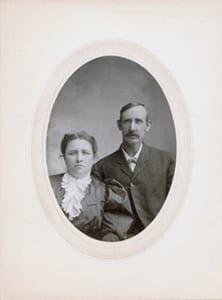
 Many different varieties of silver gelatin print were made with different processes and/or materials. They are often grey to black in tone and not as crisp or matte as a platinotype. Popular from the 1880s to the early 20th century.
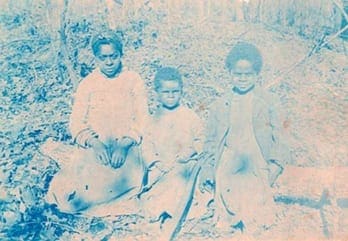 Cyanotypes are made with a “blueprint” process which results in a blue photo. Created infrequently from the 1840s to the 1890s. Popular from the 1890s to 1910.
The Importance of Documenting Your Photos
Far too often photos are passed down in a family with little or no information. Caring for your photos takes some time and attention to details. Be sure to take the time to document as much as you can. It’s best not to write on a photo, or at least not on the front of it. Inks can smear and bleed over time. Hard-tipped pens press into the soft paper of a photo, leaving raised marks on the reverse. Rather than write on your photos, photocopy them onto good quality paper (100% cotton bond, available at office supply stores) and write your notes on the photocopies.
Once you’ve recorded all the information, store both photos and photocopies together, in a safe location. If you must write on a photo, use a soft #2 pencil with paper-based photos. Modern photos are printed on resin-coated (RC) paper which is plastic in feel and difficult to write on. Sometimes pencil will work, but don’t press down so hard as to make raised marks. You can use a fast-drying “permanent” marker on RC prints, but be aware that it may cause problems as the photo ages.
Make your notes along the edges of the photo in case the ink later bleeds or smears. When documenting photos, include complete names, places, and dates. “Mother and me on my birthday” isn’t as informative to the next generation as specific names and dates. Note fun stories and memories too, as they often make history—and people—come alive.
With some work, caring for your photos can create lasting memories for future generations as your family relives the past through these valuable family keepsakes.
Causes of Deterioration
There are many reasons why photos deteriorate or become damaged. The following can happen if you don’t care for and store your photos correctly.

Some early photo technologies don’t last as long as others. For instance, albumen prints often yellow and fade while early color photos fade or lose certain colors. Sometimes the photo wasn’t processed properly by the photographer. Impurities in the water or the chemical fixer (used to “set” the photo) may not have been completely rinsed out. When this happens, it’s important to be careful as you care for your photos.
Excessive light causes fading, yellowing, and embrittlement. Damage is cumulative and irreversible. Some photos, such as albumen prints, are more susceptible than others. Although all light is damaging, incandescent light is somewhat safer than fluorescent light, which contains ultraviolet (UV) light, a more intense form of light.
High temperatures speed up chemical changes, increasing deterioration. Some photos have an “alligatored” or cracked surface; this dimensional change can be caused by extreme heat or cold.
Water can stain and leave deposits. High humidity and water can cause mold growth. Low humidity can cause embrittlement and curling. Moisture can accelerate chemical reactions, causing iron particles in a photo’s paper support or the iron mount of a tintype to rust. Moisture also allows acids to form and move quickly and can make the binder layer of a photo tacky.
Pests love gelatin and albumen binders and the cellulose found in paper. Silverfish and cockroaches like to eat the top surface of a photo, while mice and rats nibble away at edges and corners.

Industry and cars release sulfuric acid, nitric acid, and particulates into the air. Tobacco smoke, fresh paint, cleaning supplies, plywood, air fresheners, and outgassing rubber and leather (which contain sulfur) can all cause indoor pollution. Even cooking can disperse volatile oils into the air. Silver particles in light-sensitive materials can tarnish and cause spots from this indoor air pollution.
Even the cleanest of fingers can leave acid and oil which stain and attract dirt. Photos that are handled roughly or jammed into a too-small box can crack or break.
Cleaning and Repair
When caring for your photos, don’t attempt to clean or repair photos yourself. Pressure-sensitive tapes (like cellophane), glues, pins, rubber bands, and staples permanently damage your photos. Tape can stain and ooze and cause paper to become transparent as chemicals leach out and are absorbed.
Whatever you do, don’t laminate your photo! If the photo needs repair, choose a qualified photo conservator (see “Conservation” at the end of the article). He or she is trained to preserve the object in its original form, rather than alter it to look as good as new.
While it can be tempting to clean the photos yourself, a conservator has years of training in early photo manufacturing processes, chemistry, etc., and uses techniques that are safe, appropriate, and reversible. One way you can “fix” a photo yourself is through computer software. Scan the image and clean up the scan, rather than the original photo.
Sometimes, the best care for your photos, though, is to find someone well-qualified to restore them.
Storage Materials
Storing photos properly is expensive and time consuming. Before you start, determine if all of your photos are worth the effort. Ask yourself: which photos should be considered heirlooms? Are some of the photos poor quality or redundant? Which are the most fragile? Bad storage materials include everyday cardboard boxes, tissue paper, glassine, newsprint, wood, plastic wrap, and bubble wrap. Good storage materials are acid-free—they don’t contain acid that can harm photos. There are two kinds of acid-free materials available, unbuffered and buffered. Knowing how the pH scale works will help you understand the difference between the two.
The pH scale ranges from 0 (the highest concentration of acid) to 14 (the highest concentration of alkaline). In the middle is pH 7 which is neither acidic nor alkaline. “Pure” water registers as pH 7 while soapy water registers as pH 12 (alkaline) and lemon juice registers as pH 2 (acidic).
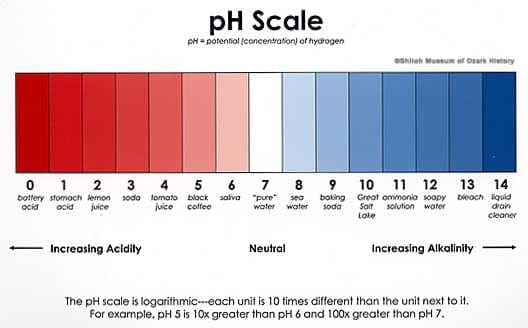
Unbuffered materials are neutral (pH 7). This type of paper, tissue, and cardboard is safe for all kinds of photos, but won’t last as long as buffered materials.
Buffered materials have an added alkaline (pH 8 or higher) that acts as an acid reservoir. The alkaline works like a sponge and soaks up more acids than unbuffered paper can.
But buffered materials can harm some photos made with protein-based materials like the albumen (egg white) in albumen prints. Because of this, some conservators recommend that you use unbuffered materials when storing photos. Unbuffered materials may not last as long or soak up as much acid as buffered materials, but they are safer.
Lignin is a material found in trees and plants. It gives them rigidity and strength. When left in paper products, lignin breaks down into acids that oxidize and discolor and cause the paper to become brittle. For this reason, lignin-free storage materials are a good choice. They’re generally made of highly purified wood pulp or cotton.
What about plastic? Some plastics are considered safe because they are stable and pH neutral. Examples of inert (unchanging) plastics are uncoated polyester, polyethylene, and polypropylene. Polyvinylchloride (PVC) is an example of a bad plastic because, over time, it can break down into hydrochloric acid.
Plastic has its problems. It can trap moisture which may lead to mold growth. Static electricity can lift fragile, flaking surfaces. Plastic doesn’t provide buffering protection against changes in humidity like paper can. Some institutions like the National Archives and Records Administration recommend that families use plastic sheet protectors to house their photos but to be on the safe side, you may want to avoid them.
Good quality storage materials won’t last forever. Eventually, they will absorb all the acids and pollution they are able to and then release these materials into the photo. Therefore it’s important to exchange these materials for new ones whenever they begin to yellow. Conservation supply companies sell pH-testing pens that will indicate, in a broad way, whether or not a material is acidic.
Storage Techniques
Next, let’s examine how to store your photos properly. Many storage options are available these days. The storage materials discussed below should be made of high-quality acid-free, lignin-free, unbuffered papers.
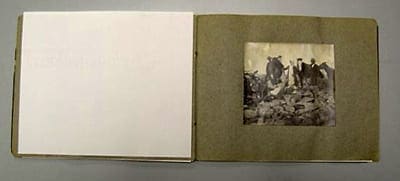
Some museums store small photos in file folders. File folders are easy to use and allow you to see the photos at a glance. If you have numerous photos, place several in a folder and interleave (place a sheet of paper between each photo) to minimize acid migration.
Envelopes are another storage possibility, but you must remove the photo each time you wish to view it. Be sure to use envelopes with a side seam rather than those that have a center seam. The glue in a center seam can eventually leach out and damage the middle part of the photo.
Store photos by size and condition. Small photos (8×10 or smaller) can be stored vertically while larger or fragile photos and daguerreotypes should be stored horizontally. For added protection, place file folders or envelopes in a box with reinforced corners. Don’t store heavy items on top of small or fragile photos. Avoid placing photos in a too-small box or overcrowding them. Don’t store photos in frames as they can trap moisture. The glass in a frame can break and damage the photo.
Some photos are fragile and require special care. Let’s look at three types of care for fragile photos.
Interleave paper between each page of a photo album to keep the acidic paper the photos are mounted on from touching photos on the next page. Don’t stuff the paper into the album’s spine, as the additional thickness of the paper might distort the spine.

You can make special cardstock folders for tintypes and daguerreotypes. Use cotton twill tape (available in fabric stores) to gently tie the cases closed.
A photo that is cracked or is very brittle should have a cardboard backing board placed underneath it. A couple of polyester strips (formed in a loop and closed with tape) can be used to hold the damaged photo against the cardboard.
Store your negatives, slides, and discs in similar quality materials as your photos. Don’t store negatives with photos as aging negatives can release harmful gasses. Some older negatives are problematic. Those made with cellulose nitrate and cellulose acetate (“safety film”) will decompose and become unstable over time. Nitrate film may spontaneously combust while acetate will give off a vinegar smell.
When storing photos, choose a good location. Attics, basements, kitchens, and bathrooms are bad because of temperature and humidity extremes. Good places are cool (65º-75º F), dry (30%-50% relative humidity), and well ventilated and are away from exterior walls, vents, and water pipes. Well-used interior closets are a good choice.
Other factors, such as good housekeeping, influence the safety and longevity of photos. Keep dirt and dust down and cleaning chemicals away from photo storage areas. Maintain heating and air conditioning units. Fix leaky pipes and faucets. Place weather stripping on doors and windows. Patch holes in walls, roofs, and eaves.
Practice good handling techniques. Museum personnel wear clean cotton gloves to protect photos from dirt, oils, and acids found on hands. Carefully handle a photo by its edges, making sure to fully support the back of the image with your hand. If you are continually researching family photos or taking them to reunions, make copies of them and leave the originals at home.
Unfortunately, it’s hard to find photo storage supplies in Northwest Arkansas. Frame shops carry buffered mat board and camera shops have plastic sheet protectors. Gloves are available at camera shops and medical supply companies. For the best choice of storage materials, check with a conservation supply company either on-line or by requesting a catalog conservator (see “On-Line Preservation Info” at end of article).
When purchasing storage materials, beware the hype! Educate yourself on what you need and why certain materials are preferred. Remember that manufacturers want to sell you something, so investigate their claims. What does “museum quality” mean? What does a manufacturer mean when it claims something is “acid-free?” Does it mean that it’s pH neutral or does it have an added alkaline buffering agent? Bleach is acid-free, but you wouldn’t want to use it on your photos.
The American National Standards Institute (ANSI) offers guidelines for photo preservation supplies:
ANSI IT9.16 – Photographic Activity Test (PAT)
This standard is for papers, plastics, and adhesives that come into contact with a photo. PAT-approved materials won’t cause the photo to fade or become stained. But PAT doesn’t address pH or lignin. Beware PAT-approved glues and tapes. These materials can change chemically over time. There are really no safe glues or tapes.
ANSI IT9.2 – Photographic Films, Plates, and Papers—Filing Enclosures and Storage Containers
This standard is for storage materials. It specifies the quality of plastics and papers and offers guidelines for the design of envelopes, sheet protectors, etc.
Digital photos have their own unique storage problems that present-day historians, curators, and conservators are pondering. Rapid advances in technology mean that a photo digitally captured in one format may or may not be able to be accessed in the future. (Remember 8-track tapes and laser discs?) To preserve a digital photo, it should be formatted in a TIFF file without compression. As each technological advance occurs, the digital info should be “migrated” to the new system. This can be expensive and time consuming. At present, black and white film is more stable than color film or digital images.
Displaying Your Photos
We understand the temptation to display old family photos. We’re in the business of displaying history, after all. While displaying your photos is possible, it’s not recommended. Light, heat, and humidity can cause permanent damage. Once you lose your original image, it’s gone forever. It’s better to frame and display a copy rather than the original. If necessary, it’s possible to display the original for short periods, as long as it’s in a good, secure location. If you must frame your original photos, choose a reputable, knowledgeable framer.
Using Hinges
Sometimes the photo can be “hung” on rice-paper hinges using purified starch paste or chemically modified cellulose as an adhesive. Don’t cut the original photo to fit the frame. Use a mat or spacers to keep the glass from touching the photo because moisture can make the photo stick to the glass.
Framing and Displaying Photos
When framing a photo, choose quality materials. Use PAT-approved, unbuffered, acid-free, lignin-free rag mat board. Glass can break and scar a photo, so Plexiglas® is a better choice. UV-plexi eliminates damaging ultraviolet light, but it doesn’t prevent damage from other forms of light.
Place framed photos in a good location away from windows, doors, fireplaces, vents, humidifiers, and bright lamps. Don’t place frames on exterior walls, in kitchens or bathrooms, or where temperatures fluctuate rapidly. Good air circulation is important.
Displaying photos in an album is a good way to store them. Once again, choose good quality materials. “Magnetic” photo albums, made with plastic covers and sheets of sticky cardstock, damages your photos. Plastic sleeves offer protection to photographic surfaces, but they trap moisture and photos can slip out. Don’t overstuff your album. Use photo corners to mount your photos; don’t use tape or glue. If you’re a scrapbooker, never crop or embellish an original photo; use a copy instead.
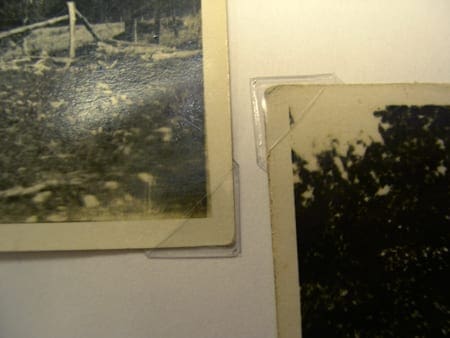
Don’t use glue or tape to secure the image; use photo corners made of acid-free paper or polyester.
Feeling Overwhelmed?
Learning how to care for your photos properly is a big task. Don’t worry if you feel overwhelmed. You don’t have to do everything all at once. Think in terms of small, achievable steps. If photos are stored in an attic, first move them to a more environmentally stable place. If photos are stored in a cardboard box, transfer them to a polyethylene storage container with a loose-fitting lid. And so on.
Photo preservation information is available online and in libraries. The following is a list of recommended websites and books. Your local museum staff may also be able to give you advice. If you’d like to hear this material presented, it’s available as one of our podcasts, “Put Your Relatives in Their Place.”
Sometimes, the best care you can offer your photos is the professional care of a museum or archive. Consider donating them to a well-run, active museum or archive with knowledgeable, trained, caring staff. Be aware that every museum has a mission and collects according to their needs.
A military museum will probably not be interested in photos of your family’s trip to the zoo. Search out appropriate museums via the Internet or through the Official Museum Directory (available at Shiloh Museum) which contains information about thousands of museums across the nation.
More Resources
The following resources provide excellent guides for how to care for your photos.
• “Caring for Your Photographic Collections” — Library of Congress
• “A Short Guide to Film Based Photographic Materials: Identification, Care, and Duplication” — Northeast Document Conservation Center
• “Care of Photographs” — Northeast Document Conservation Center
• “Acid Deterioration,” “What Causes Acids to Be Present in Paper?” “What Can We Do to Protect Paper From Acids?” “pH,” & “Preventive Conservation” — Conservation Resources International LLC
• “Care of Photographic Materials: Prints” — Minnesota Historical Society
• “Archival Storage of Photographic Materials” — Gaylord Brothers
• “Caring for Your Photographs” — American Institute for Conservation
• “Ask an Expert: Preserving Your Photographs: Windows to the Past” — Minnesota Historical Society
• “Basic Care of Photographic Materials” — Minnesota Historical Society
• “Caring for Your Family Archives” — National Archives and Records Administration
• “Creating Long-Lasting Inkjet Prints” — Northeast Document Conservation Center
• “The Care and Preservation of Photographic Prints” — Henry Ford Museum
Care and Identification of 19th Century Photographic Prints, James M. Reilly (1986: Eastman Kodak Co., Rochester, NY)
Find A Conservator and Conservation Supplies
“Guidelines for Selecting a Conservator” (includes a conservator referral service) — American Institute for Conservation
Conservation Supplies (not a complete list, nor an endorsement)
• Conservation Resources — 800/ 634-6932
• Gaylord — 800/ 448-6160
• Hollinger Corporation — 800/ 634-0491
• University Products — 800/ 628-1912